

- (219) 476-7400
Tuesday, April 2nd, 2013
When it comes to hardscaping and stone work there are many steps that go into a successful design and installation. This is a step by step look at an award winning project in Chesterton, IN. This project won the Indiana Nursery & Landscape Association (INLA) 2012 Award of Excellence, Hardscape Installation category.
Wow Small’s Landscaping. How did you do that?
Well, let me tell you.
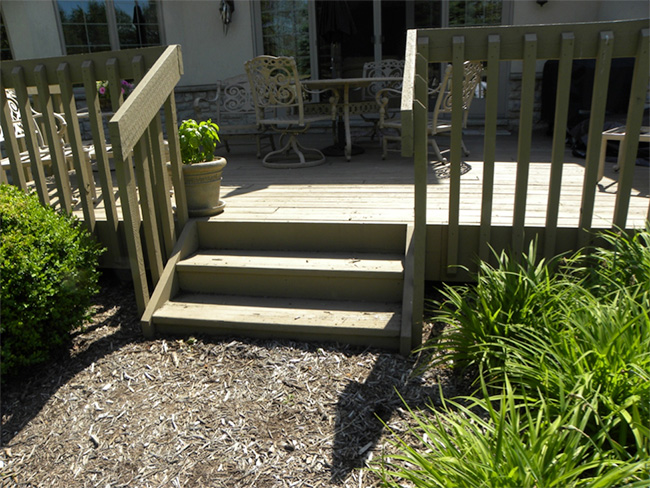
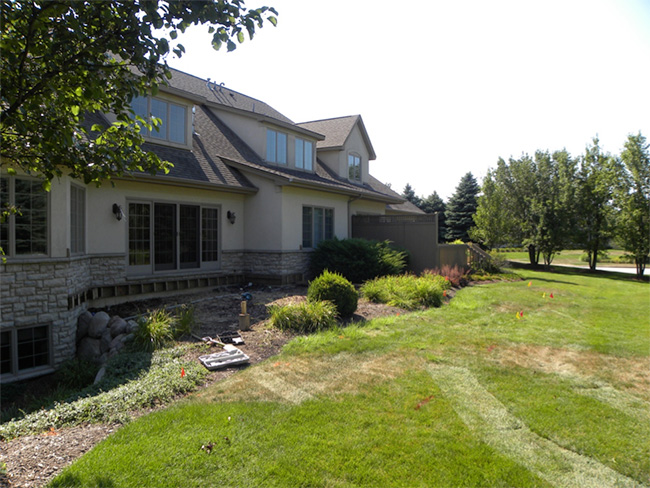
Once you call or email us we come out to meet with you and get your ideas as to what you want and what you like. In this case study we were tasked with replacing a worn out deck. The deck was unusable. The homeowner needed to wear shoes to walk on it because sap was oozing from the decking and it was too small. Also there was an awkward step leading from the patio door down to the deck. The step made it difficult to bring goodies in from the grill.
The small steps we uninviting and also full of sap.
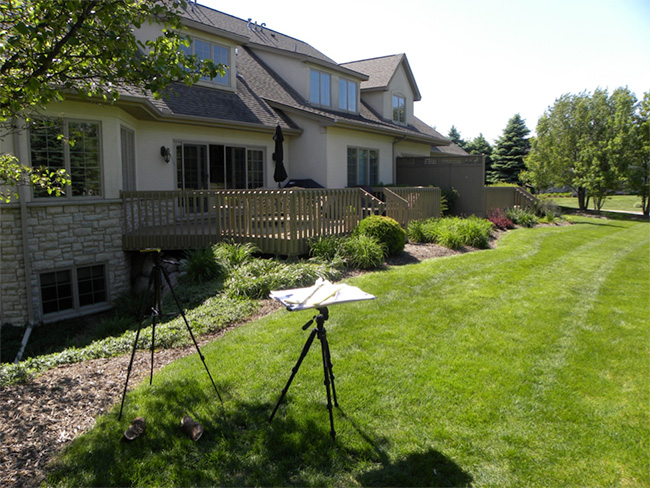
After we met with the clients we started the design process. You can see our tools of the trade here. We use a laser measuring device to retrieve accurate readings of distance and to make note of grade changes. We usually draw up the designs on-site depending on weather. It gives us a feel for the property and allows us to take any measurements we might need to accurately draw the design in our CAD program.
Once we have the drawing entered into our CAD program we meet with the client to see if we are on the right track. We almost always end up making changes. Once the changes are approved by the client and the contracts are signed the client is placed on our waiting list. We have several very specialized crews so sometimes a certain crew might not be available for a month or more depending on what is already scheduled for them. Occasionally, we are able to begin work almost immediately. We also need time to order in any materials so we have everything we need ready to go when we start the job. This saves time and money because once we start a job we stay until it is finished. If a client adds something along the way we just keep going until we are completely done before we move on to the next project. On this particular project two crews were used for different parts of the project.
Let’s take a look at how it came together.
First we removed the deck.
Then we finished tearing out the anything that would be in the way or was no longer needed.
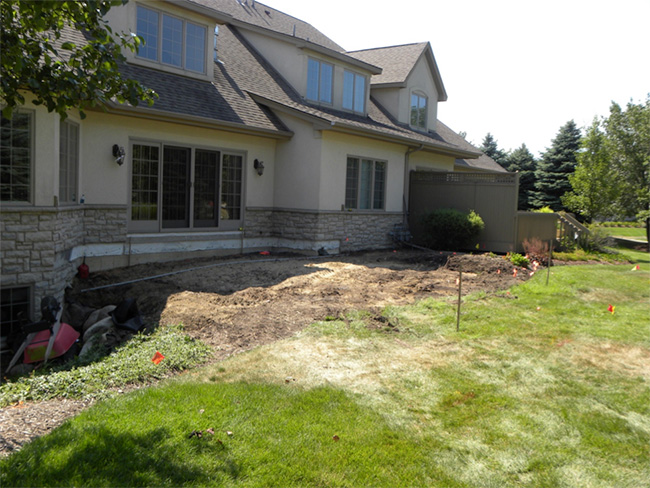
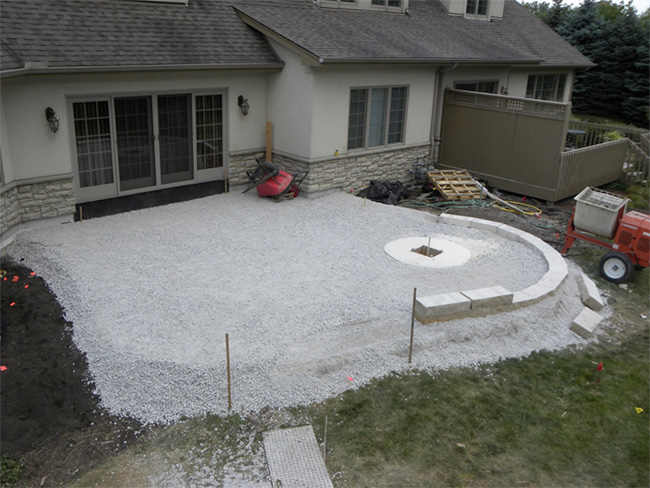
After the site was clean we started the installation. The crew used for this part of the job specializes in brick, natural stone pavers, water features and some of our retaining wall work. Here they are installing the base material for the new patio. We install the base material several inches at a time so we can compact it sufficiently. This will ensure that the patio is as solid in ten years as it is today. The wooden thing there is the concrete form for the fire pit. You can see the gas line for the key starter sticking out from the middle.
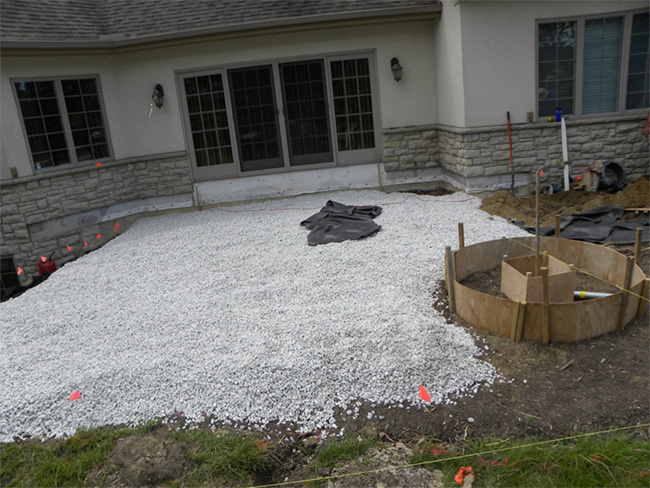
Is this photo you can see the fire pit has been poured and the base material is almost up to finish grade. At this point we can start putting in the retaining wall which will also act as a seating spot.
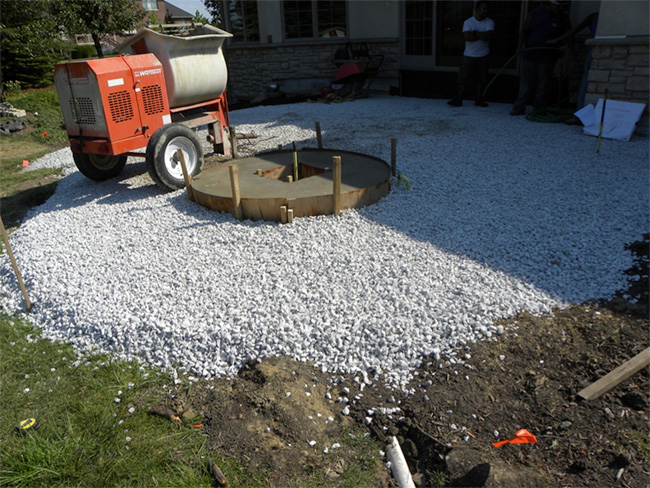
Now you can see the fire pit base is ready to go, the wall has been started, and the base material is up to grade level. The build has taken several day so for. We need that base to be just right. We use a laser level to make sure it is perfect.
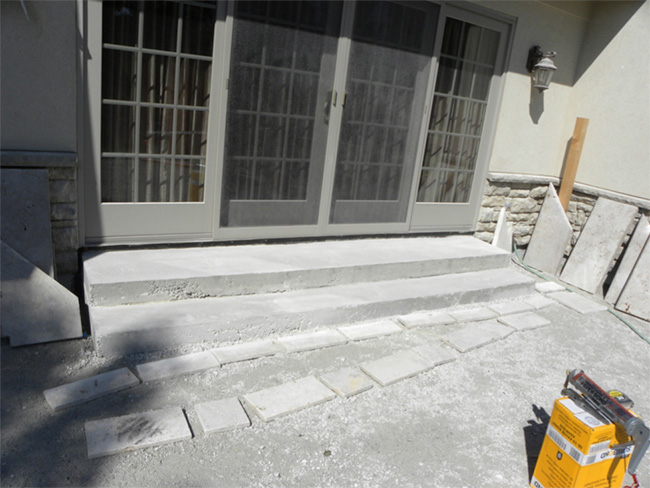
This photo shows the new step from the patio door that is poured concrete. This will be covered in natural stone. Notice how the top step is at the same level as the door for easy ingress and egress. You can also see how the crew has the stones all cut and ready to dry fit before they are affixed forever.
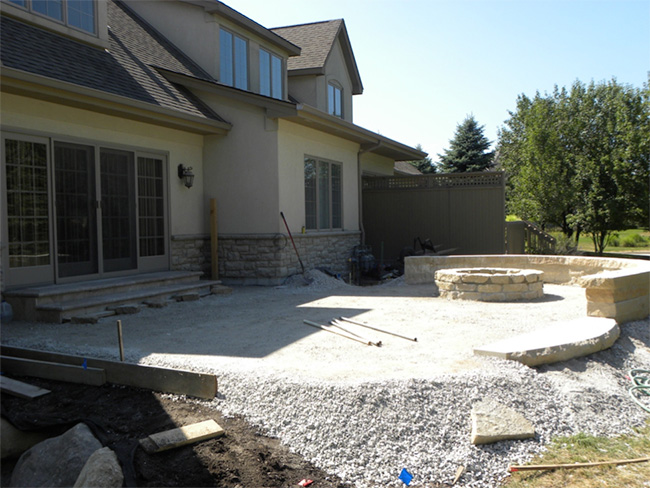
Things are really starting to shape up now. The wall and fire pit have been built and most of the stone pavers have been installed onto the poured step. Notice the custom-made, stone step leading from the patio down to the lawn.
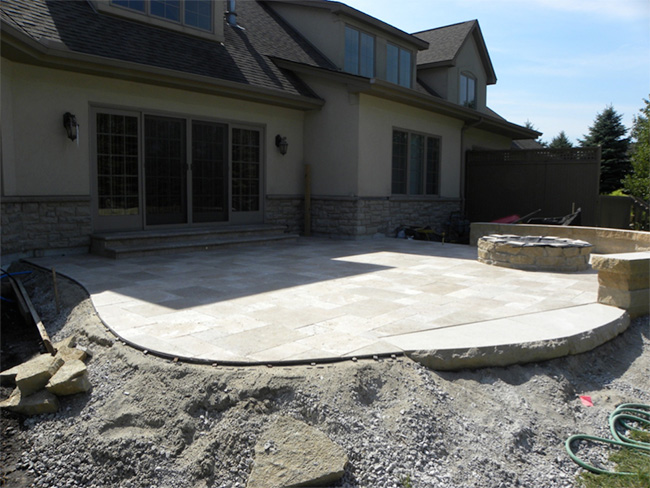
The Travertine pavers are installed now. Great work guys!
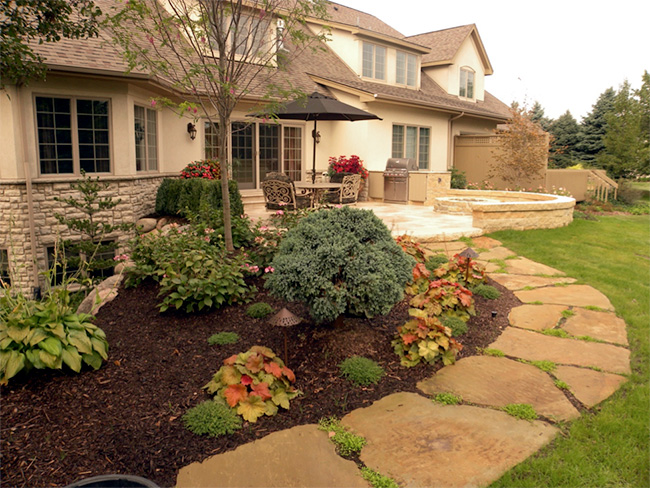
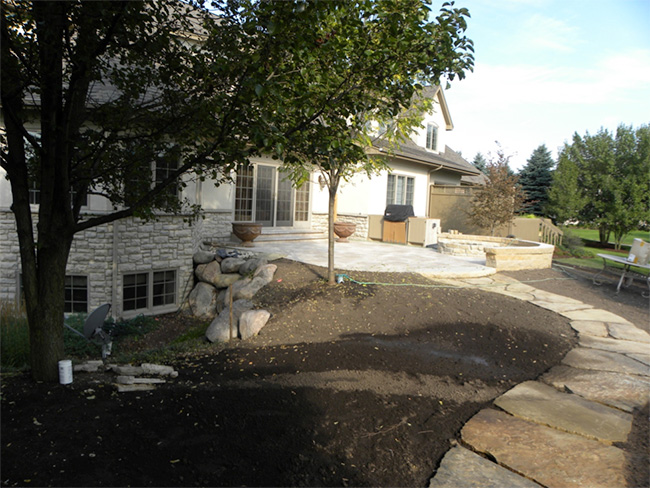
Now that the hardscaping is all but finished we can begin the landscaping portion. We needed to bring the grade of the lawn up and make a path from the patio to the golf cart path. We also made the boulder rock wall taller and planted a tree. Notice we had a surround built for the new gas grill. You can also see the containers placed on the patio. We tied into the irrigation system ran drip lines to the containers so the homeowner doesn’t have to worry about watering them every day.
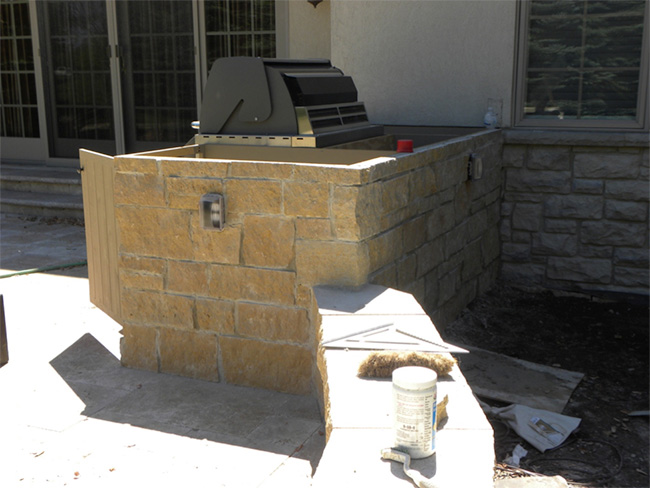
Here the first piece of stone veneer is going onto the grill surround. The veneer stone came from the same quarry used for the wall and custom step so it all matches perfectly.
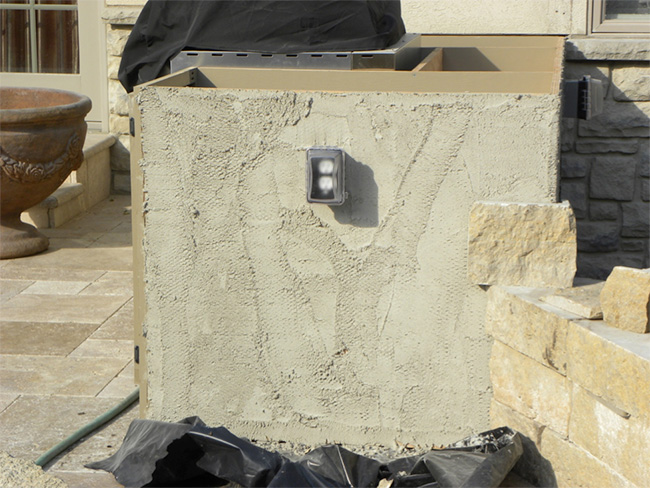
All finished with the grill. Now we are waiting for the granite people to put on the countertop.
It was time to put the plants in the ground and repair the lawn. WOW!
This project used a number of hardscaping materials including concrete work, travertine for the patio and steps with bullnosed edges, stone veneer, cut stone for the retaining wall, granite boulders for the other retaining wall, fire glass in the fire pit, and flagstone for the path. With careful planning and meticulous attention to detail the results are amazing. Most importantly, the client is happy.

Smalls Landscaping
310 North 325 East
Suite A
Valparaiso, IN 46383
Phone: (219) 476-7400
Toll Free: (855) 476-7400
Fax: (219) 476-7500


Leave a Reply
You must be logged in to post a comment.